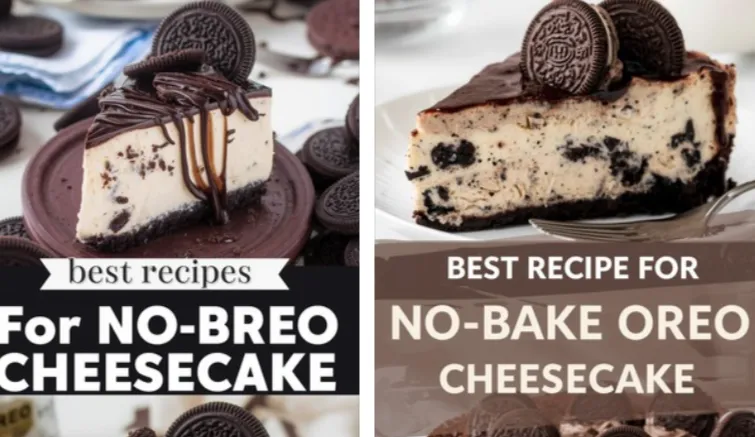
When it comes to indulgent desserts, few can rival the timeless combination of chocolate cookies and creamy cheesecake. The No-Bake Oreo Cheesecake is a dessert that brings together the crunch of Oreo cookies and the smoothness of cream cheese, all without ever turning on your oven. Perfect for hot days, busy evenings, or last-minute gatherings, this dessert is a guaranteed showstopper.
In this post, we’ll walk through everything you need to know — from ingredients and preparation to pro tips, variations, and serving ideas. Whether you’re a beginner or a seasoned home baker, this guide will help you make a perfect No-Bake Oreo Cheesecake that impresses every single time.
Why You’ll Love This Recipe
-
No baking required: Ideal for summer or anytime you don’t want to heat up the kitchen.
-
Quick and easy: Minimal prep time and simple ingredients.
-
Creamy and decadent: A rich, velvety texture balanced by the crunch of Oreo cookies.
-
Crowd favorite: Loved by kids and adults alike.
-
Customizable: Perfect base for different flavors, toppings, or mix-ins.
This cheesecake is more than just dessert — it’s comfort in every bite.
Ingredients You’ll Need
The beauty of this recipe lies in its simplicity. Most of these ingredients are pantry staples or easy to find at any grocery store.
For the Oreo Crust:
-
28 Oreo cookies (including the cream filling)
-
5 tablespoons melted butter
the Cheesecake Filling:
-
24 ounces (about 675 g) cream cheese, softened
-
1 cup powdered sugar
-
1 teaspoon pure vanilla extract
-
1 ½ cups cold heavy whipping cream
-
12 Oreo cookies, roughly chopped
the Topping (optional but recommended):
-
Whipped cream
-
Crushed Oreos or mini Oreos for garnish
Step-by-Step Instructions
Let’s break it down into easy-to-follow steps for the perfect no-bake cheesecake.
1: Prepare the Crust
-
Place 28 Oreo cookies in a food processor and blend until finely crushed.
-
Pour in the melted butter and mix until evenly coated.
-
Press the mixture into the bottom of a 9-inch springform pan. Use the back of a spoon to press it firmly and evenly.
-
Refrigerate for at least 30 minutes to set while you prepare the filling.
2: Make the Cheesecake Filling
-
In a large bowl, beat the softened cream cheese until smooth and creamy.
-
Add the powdered sugar and vanilla extract, mixing until fully combined.
-
In a separate bowl, whip the heavy cream until stiff peaks form.
-
Gently fold the whipped cream into the cream cheese mixture until smooth and fluffy.
-
Add the chopped Oreos and fold gently to distribute them evenly.
3: Assemble the Cheesecake
-
Remove the crust from the fridge.
-
Pour the filling over the crust, spreading it evenly with a spatula.
-
Smooth the top and refrigerate for at least 6 hours (or overnight for best results).
4: Garnish and Serve
Before serving, top with whipped cream and sprinkle with crushed Oreos. For a professional finish, use a piping bag to create decorative swirls.
Pro Tips for Perfect Results
-
Use full-fat cream cheese.
Low-fat or spreadable versions can make the cheesecake too soft or watery. -
Whip the cream properly.
It should form firm peaks to help stabilize the filling. -
Chill overnight if possible.
The longer it chills, the firmer and creamier it becomes. -
Use a springform pan.
It makes it easy to remove the cheesecake without damaging the edges. -
Crush the Oreos finely for the crust.
Large crumbs can prevent the crust from holding together properly.
Storage and Make-Ahead Instructions
Refrigeration:
Store the cheesecake covered in the refrigerator for up to 5 days.
Freezing:
You can freeze it (without whipped cream topping) for up to 2 months. Thaw overnight in the fridge before serving.
Make-Ahead:
This dessert is ideal for preparing in advance. Make it the day before your event and decorate it just before serving.
Variations to Try
One of the reasons this dessert is so loved is how versatile it is. Here are a few creative twists:
-
Mint Oreo Cheesecake
Add ½ teaspoon of peppermint extract and use mint Oreos for a refreshing twist. -
Chocolate Oreo Cheesecake
Mix in ½ cup melted chocolate into the filling for an extra-rich version. -
Peanut Butter Oreo Cheesecake
Add ½ cup peanut butter to the cream cheese mixture for a nutty flavor. -
Berry Oreo Cheesecake
Layer fresh strawberries, raspberries, or blueberries on top before serving. -
Oreo Cheesecake Parfaits
Create individual servings in glasses with alternating layers of crust, filling, and crushed Oreos.
Serving Suggestions
-
Serve with cold milk or hot coffee to balance the richness.
-
Add a drizzle of chocolate syrup or caramel sauce on top.
-
Pair with fresh berries for a touch of freshness.
-
For parties, make it in mini cups or jars for individual servings.
Nutritional Information (approximate per slice)
| Nutrient | Amount |
|---|---|
| Calories | 450 |
| Fat | 32 g |
| Carbohydrates | 35 g |
| Protein | 5 g |
| Sugar | 26 g |
| Fiber | 1 g |
Note: These values can vary depending on the brand of ingredients used.
Common Mistakes to Avoid
-
Not whipping the cream enough:
The filling may not hold its shape. -
Overmixing after folding:
You can lose the airy texture. -
Skipping chilling time:
The cheesecake won’t set properly. -
Using melted butter that’s too hot:
It can cause the crust to separate. -
Adding toppings too early:
Moisture can cause whipped cream or crushed Oreos to soften.
The History No-Bake Oreo Cheesecake
Cheesecake has roots dating back to ancient Greece, where it was served to athletes as a source of energy. Modern versions evolved in Europe, with cream cheese becoming the signature ingredient in the 19th century in the United States.
Oreo cookies, introduced in 1912, quickly became one of America’s most beloved snacks. The marriage of Oreos and cheesecake is a relatively modern phenomenon, but one that has taken dessert lovers by storm. The no-bake version became popular in the late 20th century when home bakers sought faster, easier desserts that didn’t sacrifice taste or texture.
Why No-Bake Cheesecake Works for Every Occasion
Whether it’s a birthday, holiday dinner, summer picnic, or just a weekend treat, the No-Bake Oreo Cheesecake fits perfectly. It requires no special baking skills, looks impressive, and can be customized endlessly. It’s also a great option for those who want to prepare dessert ahead of time without worrying about baking schedules.
You can easily adapt this dessert for:
-
Birthdays: Decorate with candles and Oreo halves.
-
Valentine’s Day: Add chocolate hearts or drizzle red berry sauce.
-
Christmas: Use peppermint Oreos and crushed candy canes.
-
Easter: Top with mini chocolate eggs.
How to Make It Vegan or Dairy-Free
For those avoiding dairy, you can make a delicious vegan version by substituting:
-
Vegan cream cheese (such as cashew-based or soy versions)
-
Coconut whipped cream instead of dairy whipping cream
-
Plant-based butter
-
Dairy-free Oreo-style cookies (most Oreos are already vegan-friendly)
The texture will still be rich and creamy, with a subtle coconut undertone that pairs beautifully with chocolate.
FAQ: Your No-Bake Cheesecake Questions Answered
Q: Can I use store-bought whipped topping instead of whipping cream?
Yes, you can substitute whipped topping like Cool Whip. Use 2 cups and fold it gently into the cream cheese mixture.
Q: How long does it take to set?
At least 6 hours, but overnight is best for a firmer texture.
Q: Can I make it gluten-free?
Yes, simply use gluten-free sandwich cookies instead of Oreos.
Q: Can I add gelatin to make it firmer?
You can, but it’s not necessary if you whip the cream well and chill it long enough.
Q: Can I double the recipe?
Yes, but use a larger pan or make it in individual jars or cups for easy serving.
The Perfect Make-Ahead Dessert
Because it’s no-bake and refrigerates well, this cheesecake is the ultimate make-ahead dessert. You can prepare it up to two days in advance, keeping it covered in the fridge until ready to serve. This makes it ideal for parties, holidays, or meal prep when you want something special without the last-minute rush.
Final Thoughts
The No-Bake Oreo Cheesecake isn’t just a dessert — it’s a celebration of simplicity and flavor. With its silky filling, crunchy crust, and unmistakable Oreo charm, it’s the kind of treat that makes any gathering memorable.