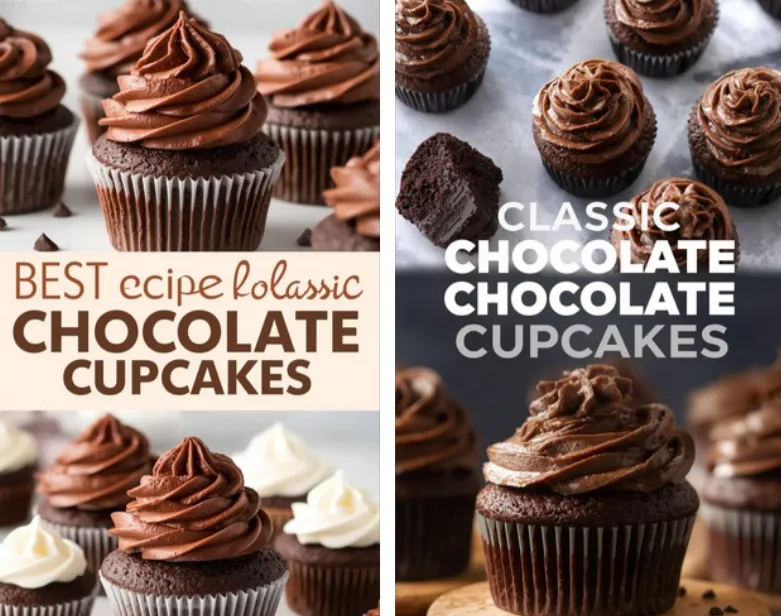
When it comes to desserts that never go out of style, Classic Chocolate Cupcakes stand proudly at the top of the list. These moist, rich, and fluffy cupcakes are the perfect balance of indulgent chocolate flavor and tender texture. Whether you’re baking for a birthday, a dinner party, or just to satisfy your sweet tooth, these cupcakes promise to impress every time.
In this ultimate guide, you’ll learn how to make bakery-quality chocolate cupcakes at home, understand the science behind their texture, discover expert baking tips, and explore the best frostings and decoration ideas to make your cupcakes truly unforgettable.
1. Why Classic Chocolate Cupcakes Never Go Out of Style
Chocolate has a universal appeal that transcends generations, and cupcakes offer the perfect bite-sized experience of this beloved flavor. Unlike layer cakes, cupcakes are convenient, personal, and easy to serve. They’re also endlessly customizable with fillings, toppings, and frostings.
But what makes a classic chocolate cupcake special is its simplicity: a soft, moist crumb paired with a deep, pure cocoa taste. It’s the comfort of homemade baking combined with the elegance of a patisserie treat.
2. The Secret to the Perfect Cupcake Texture
The hallmark of a great cupcake lies in its texture—moist, light, and tender, never dry or dense. Achieving this balance requires understanding a few baking principles:
Use the Right Cocoa Powder
Choose unsweetened natural cocoa powder for a traditional, balanced chocolate flavor. Dutch-processed cocoa has a smoother, deeper taste, but it may slightly alter the cupcake’s rise due to its lower acidity. For a classic taste, stick with natural cocoa.
Don’t Overmix
Overmixing develops gluten, making cupcakes tough. Mix only until the ingredients are combined—especially after adding flour.
Add Moisture Boosters
Ingredients like buttermilk, sour cream, or oil ensure a tender, moist crumb. Butter gives flavor, while oil keeps the texture soft for days.
Mind the Baking Time
Cupcakes bake quickly, and a few extra minutes can dry them out. Check at the 18-minute mark. When a toothpick comes out with a few moist crumbs (not completely dry), they’re perfect.
3. The Ultimate Classic Chocolate Cupcake Recipe
Ingredients
For the Cupcakes:
-
1 cup (125g) all-purpose flour
-
1 cup (200g) granulated sugar
-
½ cup (50g) unsweetened cocoa powder
-
1 teaspoon baking powder
-
½ teaspoon baking soda
-
½ teaspoon salt
-
2 large eggs, at room temperature
-
½ cup (120ml) buttermilk
-
½ cup (120ml) vegetable oil
-
2 teaspoons vanilla extract
-
½ cup (120ml) hot coffee or boiling water
For the Frosting (Classic Chocolate Buttercream):
-
1 cup (230g) unsalted butter, softened
-
2 ½ cups (300g) powdered sugar
-
½ cup (50g) unsweetened cocoa powder
-
2–3 tablespoons heavy cream or milk
-
1 teaspoon vanilla extract
-
Pinch of salt
Instructions
Step 1: Preheat and Prep
Preheat your oven to 350°F (175°C). Line a 12-cup muffin pan with cupcake liners. This ensures even baking and easy removal.
Step 2: Mix Dry Ingredients
In a large mixing bowl, sift together flour, sugar, cocoa powder, baking powder, baking soda, and salt. Sifting helps remove lumps and aerates the mixture for a lighter texture.
Step 3: Combine Wet Ingredients
In a separate bowl, whisk together eggs, buttermilk, oil, and vanilla extract until smooth.
Step 4: Combine Wet and Dry
Pour the wet ingredients into the dry mixture and mix gently until combined. The batter will be thick at this stage.
Step 5: Add Hot Coffee
Slowly pour in the hot coffee (or boiling water). The batter will thin out—this is normal and helps intensify the chocolate flavor. Stir gently until smooth.
Step 6: Bake
Divide the batter evenly among the cupcake liners, filling each about two-thirds full. Bake for 18–20 minutes or until a toothpick inserted in the center comes out with moist crumbs.
Step 7: Cool Completely
Let the cupcakes cool in the pan for 5 minutes, then transfer them to a wire rack to cool completely before frosting.
Step 8: Make the Chocolate Buttercream
Beat the butter until creamy. Gradually add powdered sugar and cocoa powder. Add vanilla and a pinch of salt. Beat in heavy cream one tablespoon at a time until you reach a smooth, fluffy consistency.
Step 9: Frost and Decorate
Once cupcakes are completely cool, frost them using a piping bag or offset spatula. Top with chocolate shavings, sprinkles, or a drizzle of melted chocolate.
4. Expert Tips for Bakery-Style Cupcakes
Tip 1: Measure Accurately
Baking is a science. Use a kitchen scale for best results. Too much flour can make cupcakes dense; too little can make them collapse.
Tip 2: Use Room Temperature Ingredients
Eggs, butter, and buttermilk should be at room temperature to ensure even mixing and a smoother batter.
Tip 3: Don’t Skip the Coffee
You won’t taste the coffee—it simply enhances the chocolate flavor, making it richer and more complex.
Tip 4: Cool Before Frosting
Frosting warm cupcakes causes the buttercream to melt. Patience is key to perfect presentation.
Tip 5: Store Properly
Store cupcakes in an airtight container at room temperature for up to 2 days, or refrigerate for up to 5. Bring them to room temperature before serving.
5. Variations on the Classic Recipe
Once you’ve mastered the base recipe, experiment with these creative variations:
Mocha Cupcakes
Add 1 teaspoon espresso powder to the batter and top with espresso buttercream.
Chocolate Peanut Butter Cupcakes
Fill each cupcake with peanut butter and frost with peanut butter buttercream.
Mint Chocolate Cupcakes
Add ½ teaspoon peppermint extract to the batter and top with mint frosting.
Salted Caramel Cupcakes
Drizzle homemade caramel over chocolate frosting and sprinkle with sea salt.
Raspberry-Filled Cupcakes
Cut a small hole in each cupcake and fill with raspberry jam before frosting.
6. The Science Behind Moist Chocolate Cupcakes
What separates an average cupcake from a bakery-quality one is balance. The perfect chocolate cupcake depends on three main factors:
-
Fat Content: Butter adds flavor; oil provides moisture. A combination ensures richness without heaviness.
-
Acidity: Buttermilk and cocoa powder react with baking soda, creating lift and a tender crumb.
-
Liquid Ratio: The addition of hot water or coffee helps dissolve cocoa particles, unlocking their full flavor potential.
Understanding this chemistry ensures consistent, professional-quality cupcakes every time you bake.
7. Pairing and Serving Suggestions
Chocolate cupcakes pair beautifully with a variety of flavors and beverages:
-
Beverages: Serve with milk, espresso, or red wine for a sophisticated touch.
-
Toppings: Add whipped cream, chocolate ganache, or a dusting of cocoa powder.
-
Occasions: Perfect for birthdays, holidays, weddings, and casual gatherings alike.
You can also serve them as part of a dessert bar, pairing mini cupcakes with fruit tarts and cookies for variety.
8. Common Mistakes and How to Avoid Them
Even experienced bakers can face cupcake challenges. Here’s how to troubleshoot:
Dry Cupcakes
Usually caused by overbaking or too much flour. Use a timer and measure accurately.
Sunken Centers
Overmixing or opening the oven too early can cause this. Keep mixing gentle and the oven door closed until nearly done.
Dense Texture
Cold ingredients or expired baking soda/powder often lead to dense cupcakes. Always check freshness before baking.
Greasy Tops
Too much oil or butter can cause greasy tops. Follow the recipe ratios closely.
9. Decorating Ideas for Classic Chocolate Cupcakes
Presentation matters as much as taste. Try these decoration ideas for different occasions:
-
Classic Swirl: Use a star piping tip for bakery-style swirls.
-
Chocolate Shavings: Add curls of dark or milk chocolate for texture.
-
Drizzle Design: Pour melted chocolate or caramel in zigzags.
-
Minimalist Look: Smooth buttercream topped with cocoa dusting.
-
Themed Decorations: Add edible gold dust, sprinkles, or colored frosting for events.
10. How to Scale the Recipe
For parties or large gatherings, you can easily double or triple this recipe.
Just remember:
-
Don’t overcrowd your oven. Bake in batches.
-
Fill liners no more than two-thirds full.
-
Keep an eye on baking time, as larger batches may need a few extra minutes.
11. Making Cupcakes Ahead of Time
Cupcakes can be baked a day in advance and stored in an airtight container. Frost them on the day of serving for the freshest taste.
Alternatively, freeze unfrosted cupcakes for up to two months. Thaw at room temperature, then frost and decorate as usual.
12. Why Homemade Cupcakes Are Better Than Box Mix
Homemade cupcakes might take a bit more effort, but the difference is undeniable:
-
Flavor: Real cocoa and fresh ingredients create depth that no mix can match.
-
Texture: Homemade versions stay moist longer without artificial stabilizers.
-
Customization: You control the sugar, quality, and creativity.
When you bake from scratch, every bite tastes like craftsmanship, not convenience.
13. Nutritional Overview (Per Cupcake, Approximate)
-
Calories: 320
-
Fat: 18g
-
Carbohydrates: 38g
-
Protein: 3g
-
Sugar: 27g
While these aren’t “diet” cupcakes, they’re perfect for an occasional indulgence and portion control is easy with individual servings.
14. Final Thoughts: The Joy of Baking Classic Chocolate Cupcakes
Baking Classic Chocolate Cupcakes isn’t just about following a recipe—it’s about creating joy in small, delicious forms. The scent of cocoa filling your kitchen, the satisfaction of watching perfectly domed cupcakes emerge from the oven, and the delight of sharing them with family or friends make every batch worth the effort.