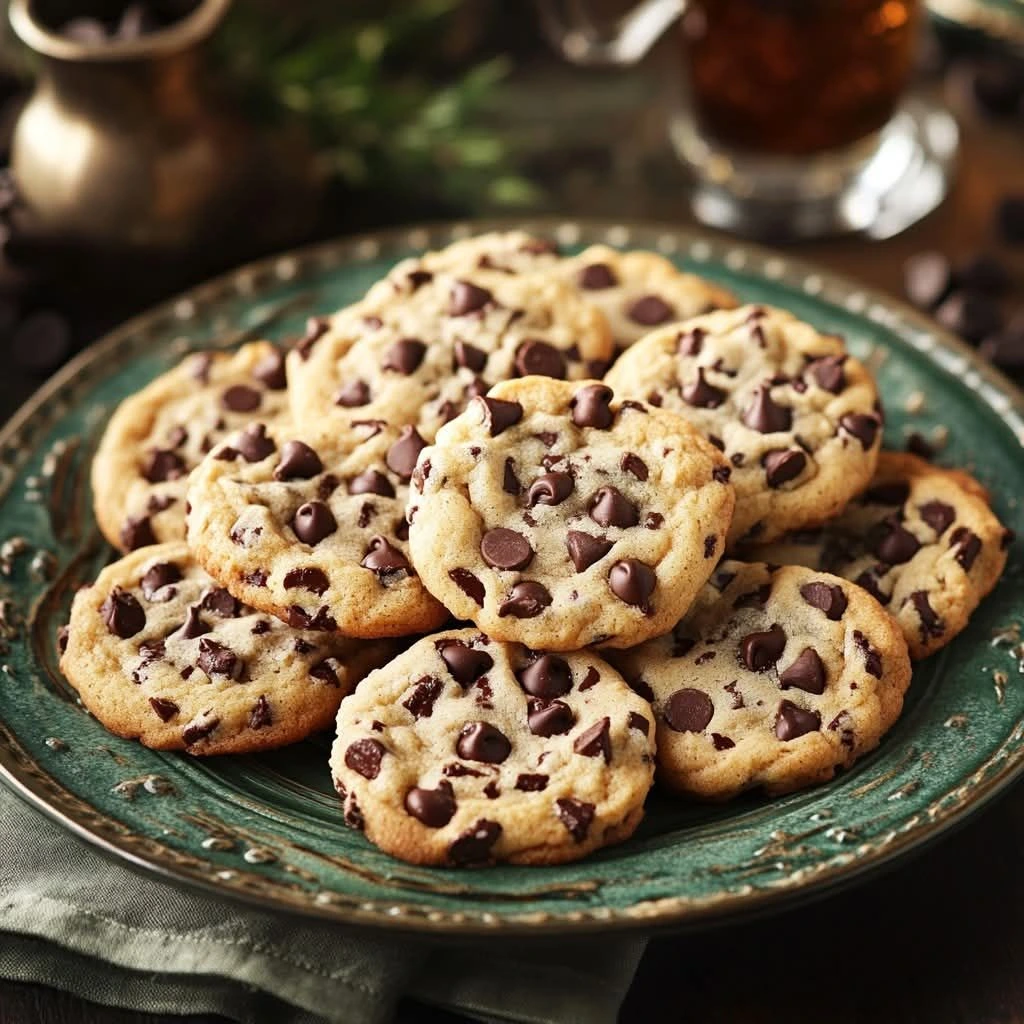

Chocolate Crinkle Cookies are a classic favorite for cookie lovers everywhere. Known for their fudgy interior, crackly powdered sugar exterior, and irresistible chocolate flavor, these cookies are perfect for holidays, celebrations, or simply a cozy afternoon treat. Baking these cookies is both fun and rewarding, and even beginners can master the perfect crinkle with a few tips and tricks.
In this article, you’ll learn everything about Chocolate Crinkle Cookies: from essential ingredients and step-by-step instructions to expert baking tips, storage advice, and creative variations. Whether you’re a seasoned baker or trying cookies for the first time, this guide ensures your Chocolate Crinkle Cookies come out perfectly every time.
Section 1: What Are Chocolate Crinkle Cookies?
Chocolate Crinkle Cookies are soft, chocolatey treats characterized by their signature cracked appearance. The powdered sugar coating creates a beautiful contrast against the dark chocolate dough, giving each cookie a snow-dusted look. These cookies are popular during the holiday season but are equally delightful all year round.
-
Texture: Fudgy inside, slightly chewy outside
-
Appearance: Cracked, powdered sugar-covered
-
Flavor: Rich chocolate with a subtle sweetness
They’re also versatile and can be customized with additional ingredients like chocolate chips, nuts, or flavored extracts.
Section 2: Ingredients You’ll Need
To make the perfect Chocolate Crinkle Cookies, quality ingredients matter. Here’s what you’ll need:
Dry Ingredients:
-
1 cup all-purpose flour
-
1/2 cup unsweetened cocoa powder
-
1 teaspoon baking powder
-
1/4 teaspoon salt
Wet Ingredients:
-
1 cup granulated sugar
-
1/4 cup vegetable oil or melted butter
-
2 large eggs
-
1 teaspoon vanilla extract
Coating:
-
1/2 cup powdered sugar (for rolling)
Optional Add-Ins:
-
1/2 cup chocolate chips
-
1/4 cup chopped nuts (walnuts or pecans)
Section 3: Step-By-Step Baking Instructions
1: Prepare the Dough
-
In a medium bowl, whisk together flour, cocoa powder, baking powder, and salt.
-
In a separate bowl, combine sugar, eggs, oil, and vanilla extract. Mix until smooth.
-
Gradually add the dry ingredients to the wet ingredients and stir until a sticky dough forms.
-
Cover the dough with plastic wrap and refrigerate for at least 2 hours or overnight. Chilling is crucial for the crinkle effect.
2: Preheat the Oven
-
Preheat your oven to 350°F (175°C) and line a baking sheet with parchment paper.
3: Form the Cookies
-
Scoop tablespoon-sized portions of dough and roll into balls.
-
Roll each ball generously in powdered sugar.
4: Bake
-
Place the dough balls on the prepared baking sheet and bake for 10-12 minutes. The edges should be set, but the center will still look slightly soft.
5: Cool and Serve
-
Allow cookies to cool on the baking sheet for 5 minutes before transferring them to a wire rack. Serve warm or store for later.
Section 4: Expert Tips for Perfect Crinkles
-
Chill the Dough: Refrigerating helps prevent spreading and enhances the crinkle effect.
-
Generous Sugar Coating: Powdered sugar creates the classic cracked look.
-
Don’t Overbake: Slightly underbaking ensures a soft and fudgy center.
-
Use Good Cocoa: High-quality cocoa powder makes a rich chocolate flavor.
Section 5: Variations and Flavor Twists
Chocolate Crinkle Cookies are highly adaptable. Some popular variations include:
-
Peppermint Crinkles: Add peppermint extract and crushed candy canes for a festive touch.
-
Nutty Chocolate Crinkles: Fold in walnuts or pecans for extra crunch.
-
Mocha Crinkles: Add 1 teaspoon instant coffee powder to enhance the chocolate flavor.
-
Double Chocolate: Mix chocolate chips into the dough for a more indulgent treat.
Section 6: Storage and Shelf Life
-
Store cooled cookies in an airtight container at room temperature for up to 5 days.
-
For longer storage, freeze baked cookies in a single layer on a baking sheet, then transfer to a freezer-safe bag for up to 3 months. Thaw at room temperature before serving.
Section 7: Pairing Ideas
Chocolate Crinkle Cookies pair beautifully with:
-
Hot chocolate or coffee
-
Milkshakes
-
Vanilla ice cream
-
Fruit compotes for a dessert platter
Section 8: Frequently Asked Questions
Q1: Can I make these cookies gluten-free?
Yes! Substitute all-purpose flour with a gluten-free flour blend. Make sure the blend includes xanthan gum for structure.
Q2: Can I use butter instead of oil?
Absolutely. Melted butter will make the cookies richer and slightly denser.
Q3: Why didn’t my cookies crack?
Likely causes: dough wasn’t chilled enough, or not enough powdered sugar. Make sure the dough is cold before baking.
Q4: Can I make mini or jumbo crinkles?
Yes. Adjust baking time: 8-10 minutes for mini cookies, 12-15 minutes for jumbo cookies.
Section 9: Why Chocolate Crinkle Cookies Are Perfect for Holidays
These cookies have a festive look and rich chocolate flavor, making them ideal for Christmas, Valentine’s Day, or any celebration. Their beautiful cracked surface, dusted with powdered sugar, resembles snow-dusted treats—perfect for cookie exchanges, gift boxes, or dessert tables.
Section 10: Fun Facts & History
-
Chocolate Crinkle Cookies are believed to have originated in the early 20th century in the United States.
-
Originally called “Chocolate Crinkle,” their crinkled appearance comes from rolling dough balls in powdered sugar and baking until cracks form.
-
The cookies’ fudgy interior makes them a favorite among chocolate lovers worldwide.
Section 11: Baking Mistakes to Avoid
-
Skipping the Chill: Warm dough spreads too much and loses the crinkle.
-
Overmixing: Overmixing can create tough cookies.
-
Uneven Sizes: Use a cookie scoop for uniform cookies.
-
Wrong Oven Temperature: Ensure your oven is accurate; too hot or cold can affect the texture.
Conclusion
Chocolate Crinkle Cookies are a timeless, fudgy, and visually stunning treat. With simple ingredients, careful preparation, and a few expert tips, anyone can bake these cookies perfectly at home. They’re ideal for holidays, gift-giving, or simply satisfying a chocolate craving.