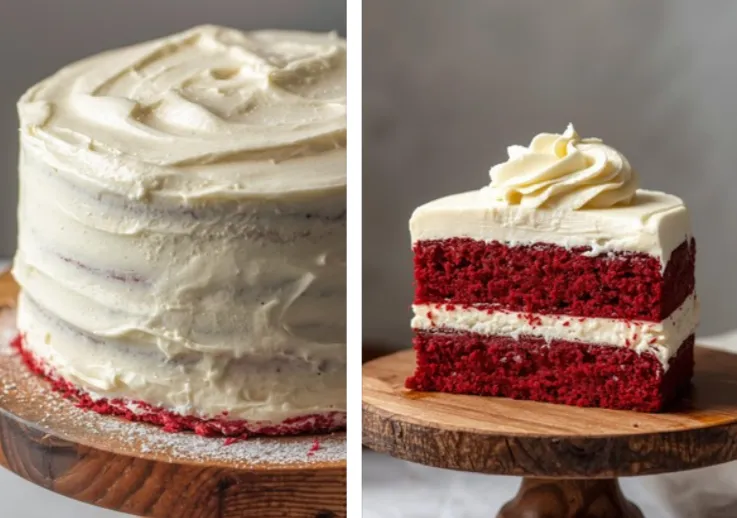
If there’s one cake that exudes elegance, indulgence, and timeless charm, it’s the Red Velvet Cake with Cream Cheese Frosting. This classic dessert is known for its striking red color, velvety texture, and the perfect balance between sweetness and tanginess. Whether you’re baking for a birthday, anniversary, or a cozy family gathering, this cake never fails to impress. In this guide, we’ll cover everything—from the ingredients and baking techniques to decorating ideas and serving tips—to help you create a flawless Red Velvet Cake at home.
History of Red Velvet Cake
Red Velvet Cake has a fascinating history rooted in American baking traditions. Some food historians trace it back to the early 20th century when the cake gained popularity due to its striking red hue. Originally, the color came from non-Dutched, natural cocoa reacting with acidic ingredients like buttermilk or vinegar. Over time, the addition of red food coloring became standard to enhance its visual appeal. Traditionally, the cake is paired with Cream Cheese Frosting, which provides a creamy, slightly tangy contrast to the sweet, cocoa-infused layers.
Why Red Velvet Cake is So Special
-
Velvety Texture: The cake’s tender crumb melts in your mouth.
-
Vibrant Color: Red velvet stands out visually, making it perfect for festive occasions.
-
Cream Cheese Frosting: Its tangy flavor balances the sweetness and richness of the cake.
-
Versatility: Works for layer cakes, cupcakes, or even cake pops.
Ingredients You’ll Need
To make the perfect Red Velvet Cake with Cream Cheese Frosting, you’ll need the following ingredients:
For the Cake:
-
2 ½ cups all-purpose flour
-
1 ½ cups granulated sugar
-
1 teaspoon baking soda
-
1 teaspoon cocoa powder
-
1 teaspoon salt
-
1 ½ cups vegetable oil
-
1 cup buttermilk, room temperature
-
2 large eggs, room temperature
-
2 tablespoons red food coloring
-
1 teaspoon vanilla extract
-
1 teaspoon white vinegar
For the Cream Cheese Frosting:
-
16 oz (450 g) cream cheese, softened
-
1 cup unsalted butter, softened
-
4 cups powdered sugar, sifted
-
1 teaspoon vanilla extract
-
Pinch of salt
Step-by-Step Baking Instructions
1. Preheat and Prep
Preheat your oven to 350°F (175°C). Grease and flour two 9-inch round cake pans, or line them with parchment paper for easy removal.
2. Mix Dry Ingredients
In a medium bowl, whisk together flour, cocoa powder, baking soda, and salt. This ensures even distribution of the cocoa and prevents clumping.
3. Combine Wet Ingredients
In a large mixing bowl, combine vegetable oil, sugar, eggs, buttermilk, vanilla extract, and red food coloring. Mix until smooth and uniform.
4. Combine Wet and Dry Ingredients
Gradually add the dry ingredients to the wet ingredients, mixing on low speed until fully combined. Avoid overmixing, as it can make the cake dense.
5. Add Vinegar
Add white vinegar last. It reacts with the baking soda to give the cake a light, airy texture. Mix gently until fully incorporated.
6. Bake
Divide the batter evenly between the prepared pans. Bake for 25–30 minutes or until a toothpick inserted in the center comes out clean. Let the cakes cool completely before frosting.
Making the Cream Cheese Frosting
-
In a large bowl, beat softened cream cheese and butter together until smooth and creamy.
-
Gradually add powdered sugar, mixing on low speed to prevent a sugar cloud.
-
Add vanilla extract and a pinch of salt. Beat on medium-high speed until light and fluffy.
Assembling the Cake
-
Level the cakes if needed to create even layers.
-
Place one cake layer on a serving plate or cake stand. Spread an even layer of frosting on top.
-
Place the second cake layer on top and apply a thin crumb coat over the entire cake. Chill for 15–20 minutes.
-
Apply a final layer of frosting. Smooth with an offset spatula or create decorative swirls using a piping bag.
Tips for Perfect Red Velvet Cake
-
Use Room Temperature Ingredients: Eggs, buttermilk, and cream cheese should be at room temperature for smooth batter and frosting.
-
Don’t Overmix: Overmixing develops gluten, which can make the cake dense.
-
Quality Cocoa: Opt for natural, unsweetened cocoa powder for authentic flavor.
-
Vinegar + Buttermilk: This combination ensures a tender, moist cake with a slight tang that complements the frosting.
Decorating Ideas
-
Classic: Smooth frosting with simple red cake crumbs on top.
-
Festive: Use sprinkles, edible glitter, or heart-shaped toppers for holidays.
-
Layered Surprise: Add a hidden layer of white chocolate ganache or berries inside for an extra wow factor.
Serving and Storage
-
Serving: Slice with a sharp serrated knife for clean edges. Serve at room temperature for best flavor.
-
Storage: Keep refrigerated for up to 5 days. Bring to room temperature before serving for a soft, creamy texture.
-
Freezing: Freeze unfrosted layers for up to 2 months. Frost after thawing.
Red Velvet Cake Variations
-
Mini Cakes: Bake in muffin tins for individual servings.
-
Vegan: Substitute eggs with flax eggs, butter with vegan margarine, and use plant-based milk.
-
Gluten-Free: Replace all-purpose flour with a gluten-free blend for a safe alternative.
Frequently Asked Questions
1. Why is my Red Velvet Cake dry?
Overbaking or overmixing can dry out the cake. Ensure you bake for the recommended time and mix until just combined.
2. Can I use cream cheese frosting from a store?
Yes, but homemade frosting tastes fresher and is easier to customize in sweetness and tanginess.
3. Can I make the cake ahead of time?
Yes, bake a day in advance and refrigerate layers. Frost just before serving for the best presentation.
4. Can I make cupcakes instead?
Absolutely! Bake for 18–22 minutes at the same temperature, then frost once cooled.
Why Red Velvet Cake Works for Every Occasion
From Valentine’s Day to Christmas and birthdays, Red Velvet Cake with Cream Cheese Frosting adds a touch of elegance. Its visual appeal combined with a melt-in-your-mouth texture makes it a crowd-pleaser every time.
Conclusion
Red Velvet Cake with Cream Cheese Frosting is more than just a dessert—it’s a celebration in every bite. With this comprehensive guide, you can confidently bake a cake that’s moist, visually stunning, and irresistibly creamy. Follow the tips, use quality ingredients, and add your personal decorating touch to make a cake that’s perfect for any occasion. Whether it’s a special holiday, a birthday, or simply treating yourself, this cake promises to impress every single time.