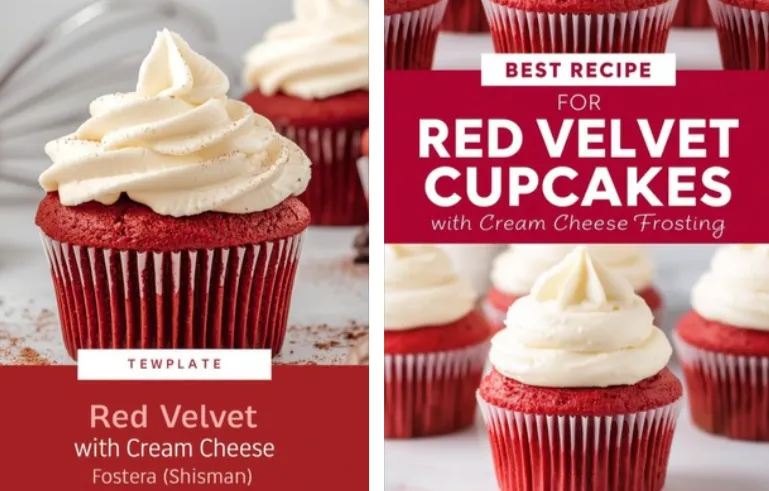
Few desserts evoke as much admiration as the Red Velvet Cupcake. Its vibrant red hue, tender crumb, and creamy frosting make it a show-stopping treat that delights both the eyes and the taste buds. But beyond its striking appearance lies a flavor profile that’s perfectly balanced—mild cocoa undertones, a subtle tang from buttermilk, and a luscious frosting that brings everything together in harmony.
In this guide, you’ll learn everything about making perfect Red Velvet Cupcakes with Cream Cheese Frosting—from the science behind the ingredients to expert baking techniques, storage tips, variations, and presentation ideas. Whether you’re baking for a special occasion, a holiday, or just because you love classic desserts, these cupcakes will never disappoint.
The History Behind Red Velvet Cupcakes
The story of red velvet cake dates back to the early 20th century in the United States. Originally, “velvet cakes” referred to soft-textured cakes made with cocoa to break down flour’s coarseness, resulting in a “velvety” texture.
During the 1930s, the Adams Extract Company played a major role in popularizing the vivid red color we now associate with red velvet. They marketed red food coloring and flavor extracts using the cake as a promotional recipe. Over time, red velvet evolved from a simple chocolate cake into an American classic—luxurious, romantic, and irresistible.
The cupcake version emerged later as baking trends shifted toward individual desserts. Compact, beautiful, and perfect for sharing, red velvet cupcakes quickly became a staple at weddings, birthdays, and Valentine’s Day celebrations.
Understanding the Science of Red Velvet Cupcakes
A perfect red velvet cupcake is the result of carefully balanced chemistry. Let’s break down the science behind the magic:
-
Acidity and Color Reaction:
The combination of cocoa powder and acidic ingredients like buttermilk and vinegar enhances the red color and gives a mild tang. Natural cocoa has anthocyanins that react with acid to intensify the reddish hue. -
Cocoa Powder:
It provides a subtle chocolate flavor, but not overpowering like in chocolate cake. The goal is a delicate balance between cocoa and vanilla. -
Buttermilk and Vinegar:
They tenderize the crumb and add moisture. Their acidity reacts with baking soda, helping the cupcakes rise. -
Oil or Butter:
Oil produces a moister texture, while butter adds a rich, buttery taste. Some recipes combine both for the best of both worlds. -
Red Food Coloring:
Modern recipes often use gel or liquid red coloring to enhance the vibrant color. However, natural beetroot powder can also be used for a chemical-free option.
Understanding these interactions ensures consistent results every time you bake red velvet cupcakes.
Ingredients for Red Velvet Cupcakes
Here’s what you’ll need to create a dozen moist, bakery-quality cupcakes:
For the Cupcakes:
-
1 ¼ cups (160g) all-purpose flour
-
1 tablespoon unsweetened cocoa powder
-
½ teaspoon baking soda
-
¼ teaspoon salt
-
½ cup (120ml) buttermilk, room temperature
-
½ teaspoon white vinegar
-
½ cup (120ml) vegetable oil
-
¾ cup (150g) granulated sugar
-
1 large egg, room temperature
-
1 teaspoon pure vanilla extract
-
1 tablespoon red food coloring (or natural beetroot powder)
the Cream Cheese Frosting:
-
8 oz (225g) cream cheese, softened
-
½ cup (115g) unsalted butter, softened
-
2 cups (250g) powdered sugar, sifted
-
1 teaspoon vanilla extract
-
Pinch of salt
Step-by-Step Instructions
1: Prepare Your Oven and Tools
Preheat the oven to 350°F (175°C) and line a 12-cup muffin tin with cupcake liners. This ensures even baking and easy cleanup.
2: Combine the Dry Ingredients
In a medium bowl, whisk together flour, cocoa powder, baking soda, and salt. Set aside. This step evenly distributes the leavening agent and prevents lumps.
3: Mix Wet Ingredients
In a large bowl, whisk the sugar, oil, and egg until smooth and slightly thickened. Add the vanilla extract, vinegar, and buttermilk. Stir in the red food coloring until the color is uniform.
4: Combine and Mix
Gradually add the dry ingredients to the wet ingredients, mixing just until combined. Overmixing can lead to dense cupcakes. The batter should be smooth and slightly thick.
5: Fill and Bake
Divide the batter evenly among cupcake liners, filling each about two-thirds full. Bake for 18–22 minutes, or until a toothpick inserted in the center comes out clean.
6: Cool Completely
Let cupcakes cool in the pan for 5 minutes, then transfer them to a wire rack to cool completely before frosting. This prevents the frosting from melting.
How to Make the Cream Cheese Frosting
-
Beat the softened butter and cream cheese together until smooth and creamy, about 2–3 minutes.
-
Gradually add sifted powdered sugar, one cup at a time, beating after each addition.
-
Add vanilla extract and a pinch of salt.
-
Beat for another 2–3 minutes until light, fluffy, and spreadable.
For piping, refrigerate the frosting for 20 minutes to firm it slightly. Then use a piping bag fitted with a star or round tip for professional-looking swirls.
Expert Tips for Perfect Red Velvet Cupcakes
-
Room Temperature Ingredients:
This ensures smooth blending and a uniform batter, which leads to an even crumb. -
Don’t Overmix:
Overworking the batter can activate gluten, making cupcakes dense. -
Use Natural Cocoa:
Dutch-process cocoa is alkaline and won’t react the same way with acidic ingredients. -
Accurate Coloring:
Start with less food coloring and add gradually until you achieve your desired red shade. -
Cool Before Frosting:
Never frost warm cupcakes; it causes the frosting to melt and lose structure. -
Use High-Quality Cream Cheese:
Low-fat or spreadable varieties often contain excess moisture and can make frosting runny.
Flavor Variations and Creative Twists
Once you’ve mastered the classic version, you can explore creative variations that bring new flavors or textures:
-
Chocolate-Chip Red Velvet Cupcakes: Add mini chocolate chips to the batter for extra indulgence.
-
Filled Cupcakes: Hollow out the center and fill it with raspberry jam, whipped cream, or chocolate ganache.
-
Coconut Red Velvet: Mix shredded coconut into the frosting for a tropical twist.
-
Mini Red Velvet Bites: Use a mini muffin pan to create bite-sized treats, perfect for parties.
-
Vegan or Gluten-Free Versions: Substitute dairy and flour with plant-based and gluten-free alternatives while maintaining the same base structure.
Presentation and Decoration Ideas
Presentation elevates your cupcakes from homemade to professional. Here are creative serving ideas:
-
Pipe the frosting in tall, elegant swirls and top with white chocolate shavings.
-
Decorate with red velvet crumbs for a signature bakery touch.
-
Add fresh raspberries, edible flowers, or gold leaf for a luxurious finish.
-
For holidays, use themed liners and sprinkles—red hearts for Valentine’s, gold dust for Christmas, or cream-white pearls for weddings.
Common Mistakes and How to Avoid Them
-
Cupcakes Turning Brownish Instead of Red:
This happens when you use too little food coloring or too much cocoa. Balance is key. -
Dry Texture:
Overbaking or incorrect flour measurement causes dryness. Always spoon and level your flour. -
Runny Frosting:
Ensure your butter and cream cheese are softened, not melted. Chill briefly if needed. -
Cupcakes Sinking:
Overbeating or opening the oven door too soon can deflate them. Wait until the cupcakes are almost done before checking.
How to Store and Preserve Freshness
Red velvet cupcakes are best enjoyed fresh, but they can last if stored correctly:
-
Room Temperature: Keep unfrosted cupcakes in an airtight container for up to 2 days.
-
Refrigerator: Frosted cupcakes last up to 5 days in a sealed container. Bring them to room temperature before serving for the best texture.
-
Freezer: Freeze unfrosted cupcakes for up to 2 months. Thaw overnight in the refrigerator, then frost before serving.
Pairing Ideas: What Goes Well with Red Velvet Cupcakes
These cupcakes pair beautifully with several beverages and side desserts:
-
Coffee: The bitterness complements the sweetness perfectly.
-
Milk or Hot Chocolate: Ideal for a comforting treat.
-
Champagne or Rosé: For festive occasions, the bubbles balance the creamy frosting.
-
Fruit Salad: A refreshing contrast to the rich cupcake texture.
Why Red Velvet Cupcakes Are Perfect for Every Occasion
From romantic dinners to holiday celebrations, red velvet cupcakes fit any setting. Their stunning color adds a touch of elegance, while their flavor pleases almost every palate. They symbolize love, warmth, and celebration, making them a timeless dessert that never goes out of style.
They are especially popular during:
-
Valentine’s Day
-
Christmas gatherings
-
Bridal and baby showers
-
Birthdays and anniversaries
-
Corporate events or tea parties
Making Red Velvet Cupcakes Ahead of Time
If you’re planning for an event, you can make components ahead:
-
Cupcakes: Bake 1–2 days in advance and store airtight.
-
Frosting: Prepare and refrigerate up to 3 days ahead.
-
Assembly: Frost on the day of serving for the freshest look and taste.
Nutritional Information (per cupcake)
Approximate values may vary:
-
Calories: 330
-
Fat: 18g
-
Carbohydrates: 38g
-
Sugar: 29g
-
Protein: 3g
These cupcakes are rich, so moderation ensures both indulgence and balance.
Conclusion
Red Velvet Cupcakes with Cream Cheese Frosting are a masterpiece of flavor and texture—a dessert that feels special yet comforting. Their velvety crumb, subtle cocoa taste, and tangy cream cheese topping create a perfect harmony that satisfies both aesthetic and culinary desires.