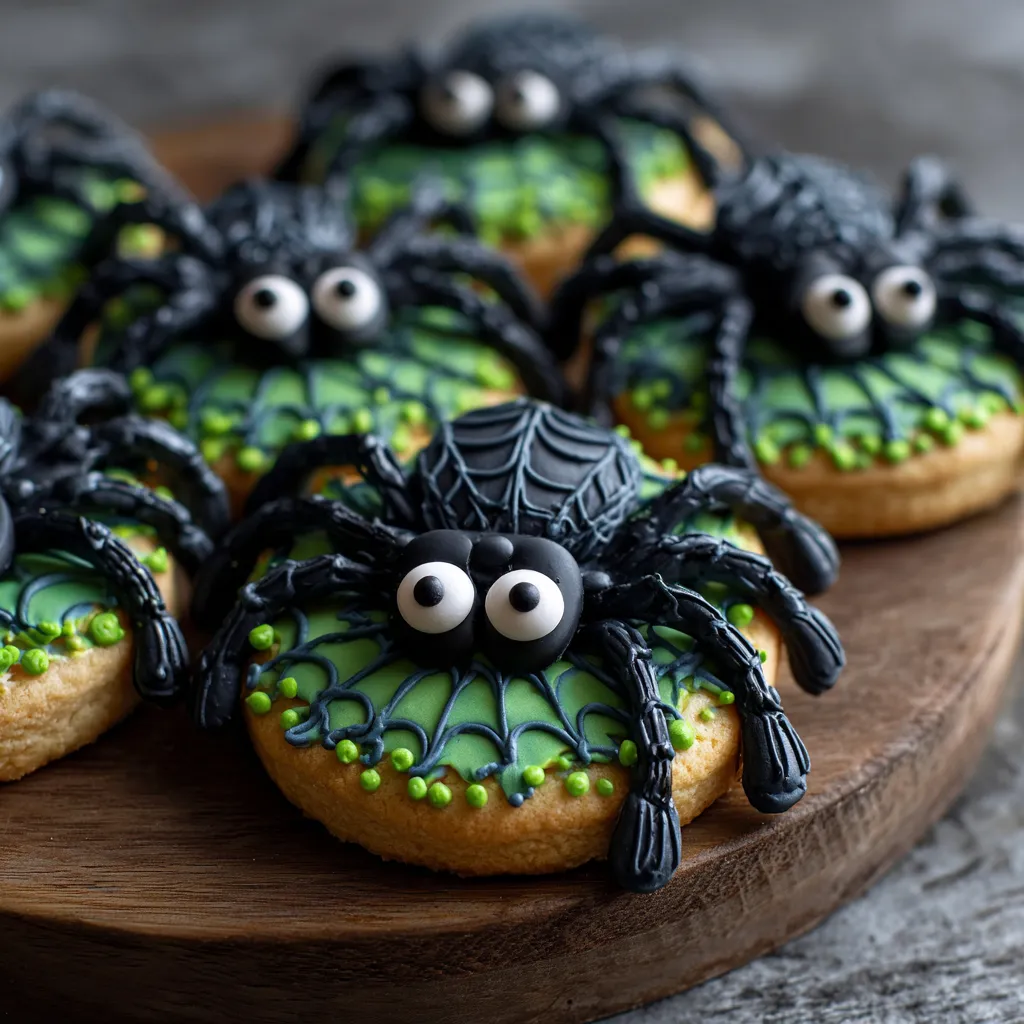
Halloween is all about spooky vibes, fun costumes, and of course—irresistible treats. Among the endless lineup of Halloween desserts, Spooky Spider Cookies are the perfect blend of creepy and delicious. These cookies not only taste amazing but also add a playful, festive touch to your Halloween dessert table.
In this in-depth guide, you’ll learn how to make Spooky Spider Cookies step by step, get expert baking tips, serving ideas, nutritional values, and variations to make them truly unforgettable. By the end of this article, you’ll be more than ready to bake a batch of these frightfully fun cookies that will wow both kids and adults alike.
SEO Focus: Throughout this article, the keyword Spooky Spider Cookies will be emphasized to help readers and search engines recognize this recipe as the go-to Halloween treat guide.
Why Make Spooky Spider Cookies?
-
Fun and festive: The spider design is spooky enough for Halloween but still adorable for children.
-
Easy to make: You don’t need fancy baking skills or complicated tools.
-
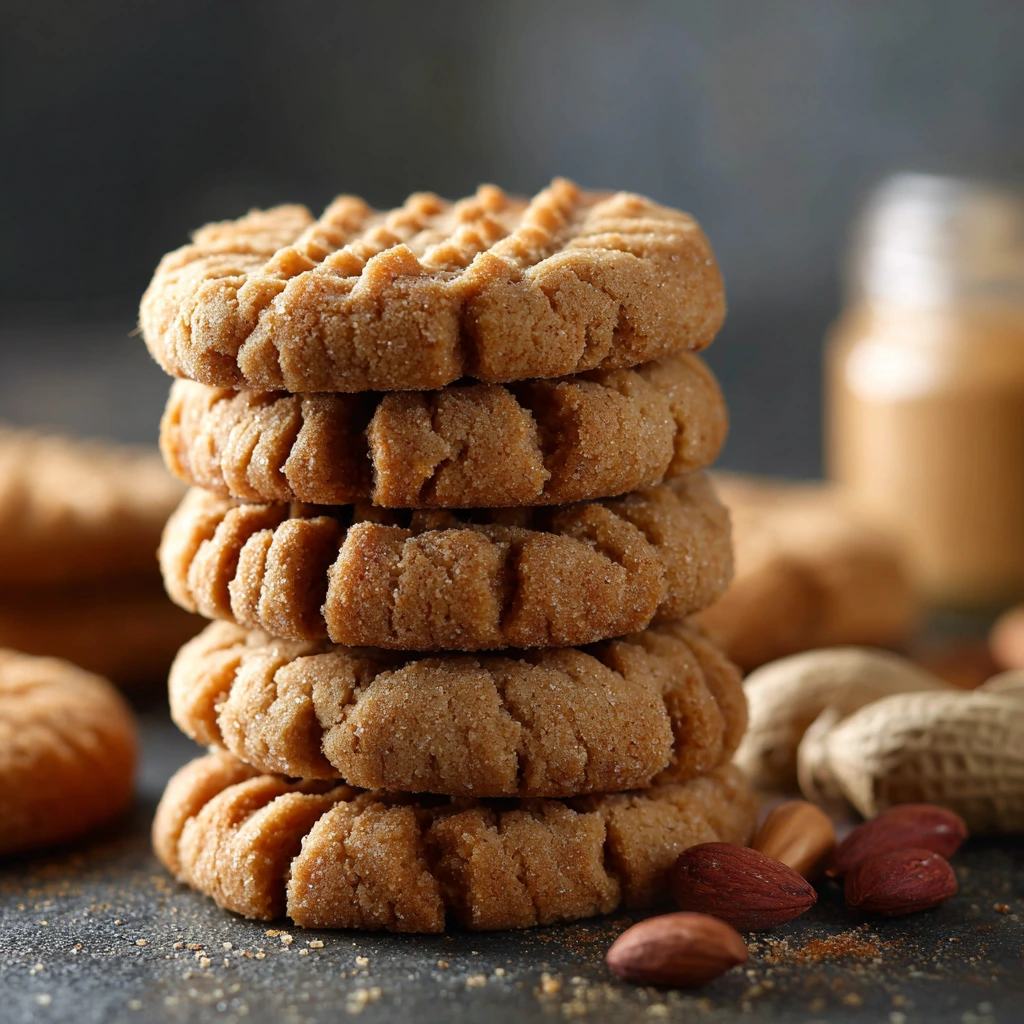
Customizable: Use your favorite cookie base—chocolate chip, sugar, or peanut butter.
-
Crowd-pleaser: Both the taste and appearance guarantee compliments at parties.
Ingredients for Spooky Spider Cookies
Here’s a detailed list of what you’ll need to make about 24 cookies:
-
1 cup unsalted butter (softened)
-
1 cup granulated sugar
-
1 cup packed brown sugar
-
2 large eggs
-
2 teaspoons vanilla extract
-
2 ½ cups all-purpose flour
-
1 teaspoon baking soda
-
½ teaspoon salt
-
1 ½ cups chocolate chips (semi-sweet or dark)
-
24 chocolate truffles or round chocolates (e.g., Lindt truffles, Rolos, or Reese’s) – for spider bodies
-
½ cup mini chocolate chips – for spider eyes
-
½ cup melted chocolate or chocolate frosting – for spider legs
Required Kitchen Tools
-
Mixing bowls (large and medium)
-
Electric mixer or whisk
-
Measuring cups and spoons
-
Baking sheet(s)
-
Parchment paper
-
Cooling rack
-
Piping bag or zip-lock bag (for spider legs)
-
Spoon or cookie scoop
Step-by-Step Instructions
1: Prepare the Cookie Dough
-
In a large bowl, cream together the butter, granulated sugar, and brown sugar until light and fluffy.
-
Add the eggs one at a time, mixing well after each addition.
-
Stir in the vanilla extract.
2: Mix the Dry Ingredients
-
In a separate bowl, whisk together the flour, baking soda, and salt.
-
Slowly add the dry ingredients into the wet mixture, mixing until just combined.
-
Fold in the chocolate chips.
3: Shape and Bake
-
Preheat your oven to 350°F (175°C).
-
Scoop the dough into balls (about 2 tablespoons each) and place them on parchment-lined baking sheets.
-
Bake for 10–12 minutes or until golden brown at the edges.
4: Add Spider Bodies
-
Immediately after removing the cookies from the oven, gently press one round chocolate truffle into the center of each cookie.
-
Transfer cookies to a cooling rack.
5: Decorate with Legs and Eyes
-
Once cookies have cooled slightly, melt chocolate and transfer it to a piping bag (or a zip-lock bag with a small corner snipped).
-
Pipe eight legs extending from each truffle body.
-
Use a dab of melted chocolate to attach two mini chocolate chips for eyes.
6: Let Set and Serve
-
Allow cookies to cool completely so the chocolate hardens.
-
Serve them on a spooky Halloween platter for maximum effect!
Helpful Tips for Perfect Spooky Spider Cookies
-
Timing is key: Place the truffles onto cookies right after baking to ensure they stick properly.
-
Use sturdy chocolates: Avoid soft-filled truffles that melt too quickly. Solid chocolates work best.
-
Chill before decorating: If the cookies are too warm, the chocolate legs may melt or spread.
-
Get creative: Use candy eyeballs instead of mini chocolate chips for a scarier look.
-
Make ahead: Bake cookies one day in advance and decorate them on Halloween for ultimate freshness.
Fun Variations
-
Peanut Butter Spiders: Use peanut butter cookies as the base.
-
Double Chocolate Spiders: Swap the cookie base for double chocolate chip cookies.
-
Gluten-Free Spooky Spider Cookies: Use a gluten-free flour blend.
-
Candy Webs: Drizzle white chocolate webs across the tray for an extra spooky presentation.
Storage and Make-Ahead Options
-
Store cookies in an airtight container at room temperature for up to 5 days.
-
Refrigerate if you live in a warm climate to keep the chocolate from melting.
-
Freeze undecorated cookies for up to 2 months and decorate closer to Halloween.
Nutritional Information (per cookie, approximate)
-
Calories: 220
-
Carbohydrates: 28 g
-
Sugar: 18 g
-
Fat: 11 g
-
Protein: 3 g
-
Fiber: 1 g
Note: Values will vary depending on the cookie base and type of chocolate used.
Why Spooky Spider Cookies Are the Best Halloween Treat
Halloween treats should be fun, interactive, and memorable. Unlike store-bought candy, these cookies show effort and creativity while still being easy enough for beginners. They make excellent additions to:
-
School Halloween parties 🎒
-
Family baking nights 👨👩👧👦
-
Halloween potlucks 🕸️
-
Spooky dessert tables 🍪